What Is a Lighting Lens and Why It Matters in Outdoor Projects
Have you ever noticed this? Two LED fixtures, same wattage, same spec sheet—yet one lights a building facade beautifully dozens of meters away, while the other barely covers a nearby flower bed evenly. Or take wall washers: some walls look smooth and blended, others have ugly bright and dark bands that make you wonder if the installer was blind.
The difference usually isn’t the LED chip. It’s the lens. I’ll say it straight: in outdoor lighting, the lens is not a protective cover. It’s the thing that makes or breaks your project. It controls how wide the beam goes, how far it throws, whether the light is comfortable or blinding. Two fixtures with the same power can perform like night and day purely because of the lens design. If you don’t believe me, go test a cheap linear light against a good one on a wall. You’ll see.
And this matters most outdoors—facades, bridges, landscapes. A glass curtain wall needs a wall washer that shoots a uniform vertical beam from the ground up. A historic corridor wants a clean, continuous line from a linear light. A sculpture demands a floodlight that hits it precisely, not spills all over the bush next to it. Without a proper lens? Forget it. You’ll never get those effects.
What Is a Lighting Lens?
Let’s keep it simple. A lighting lens is a piece of transparent plastic or glass sitting in front of the LED. It’s not flat—it’s shaped with curves, tiny textures, or ridges. When light passes through, those structures bend the light (that’s refraction) and redirect it into whatever pattern you need.
The lens doesn’t change the color, and it doesn’t add lumens. What it does is decide where the light goes. That’s why two identical LEDs behave so differently with different lenses. I’ve seen projects where someone swapped a cheap 30° lens for a proper TIR lens and got double the effective distance without changing anything else. No magic—just optics.
Why Lenses Matter in LED Fixtures
Without a lens, a bare LED throws light in a roughly 120° cone—brightest in the middle, fading at the edges. That’s fine for a ceiling light in a closet. It’s terrible for a building facade. The light spreads too much, falls short, and creates harsh, ugly transitions.
A good lens fixes that. How?
Concentrating – Narrow beams (5°–15°) send light far. Think bridge towers, sports stadiums, or a spire on a skyscraper.
Spreading – Diffuser lenses give you wide, soft beams. Perfect for lawns, parks, or path lighting where you don’t want sharp shadows.
Shaping – Asymmetric or linear patterns for wall washers or architectural outlines. This is where good lenses really shine.
Reducing glare – By controlling the angle of exit, you can avoid blinding pedestrians. I’ve walked down streets where every wall light stabbed my eyes. That’s a cheap lens (or no lens) problem.
Here’s my rule: the lens is the traffic controller of light. Without it, light runs wild. With a good one, it becomes a precise tool. And in outdoor projects, precision pays.
How a Lens Works
The physics is simple: refraction. Light bends when it moves from one material to another—say, from plastic/glass into air. A lens uses curved surfaces to bend the light twice: once entering, once exiting. That redirection is how you aim light exactly where you want it.
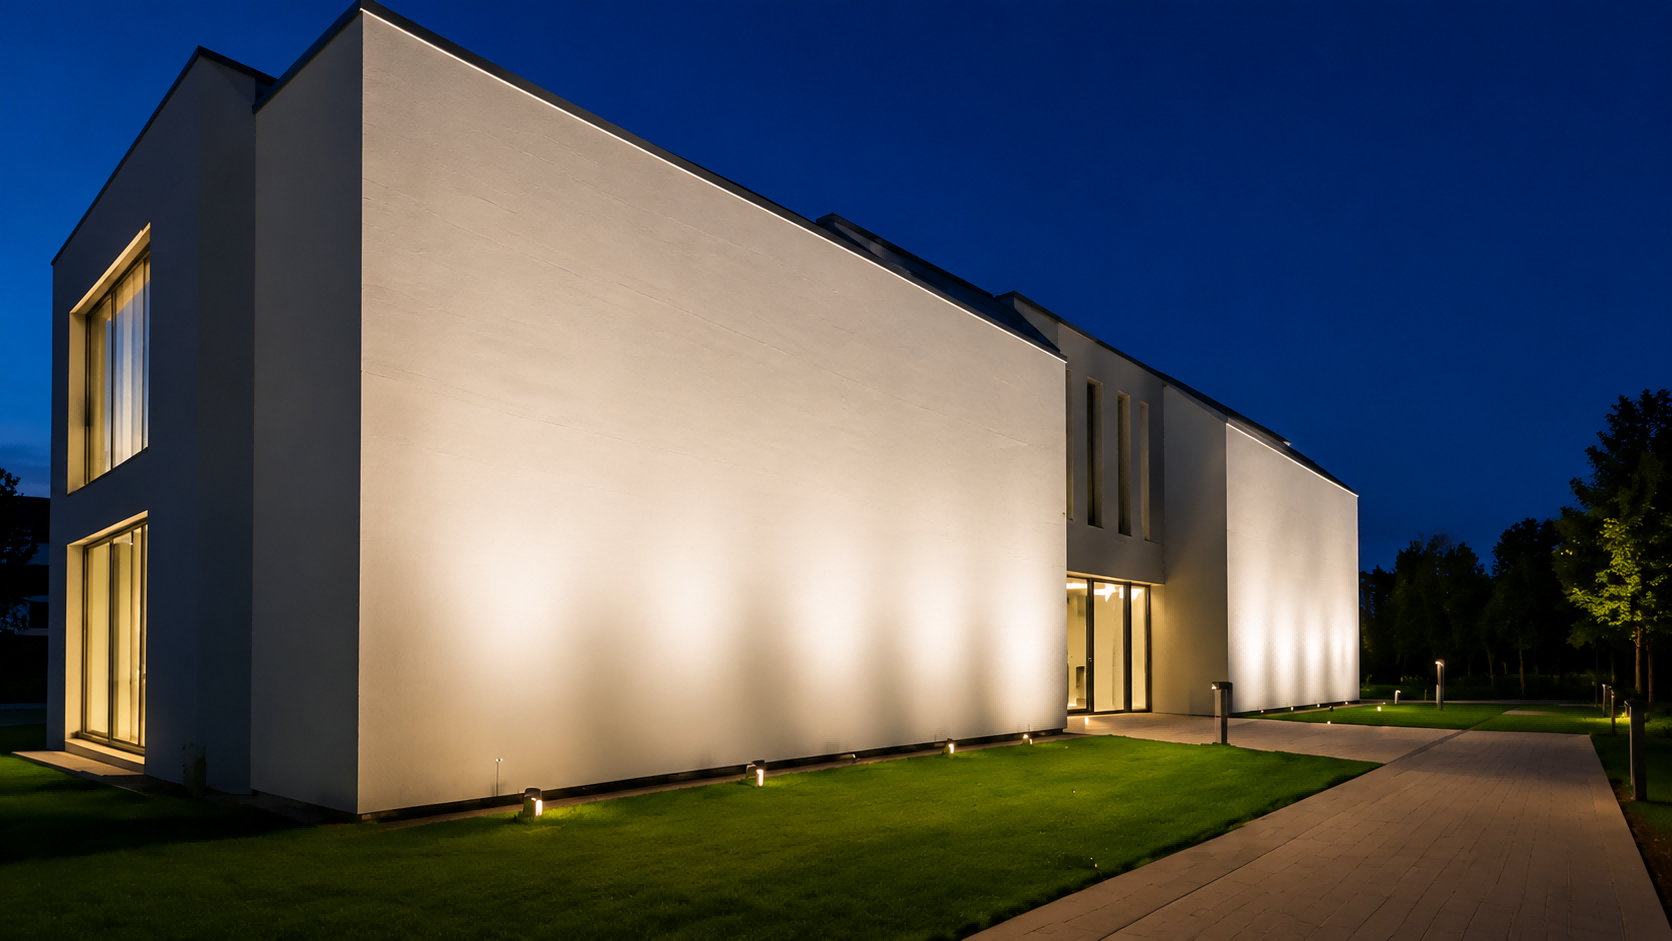
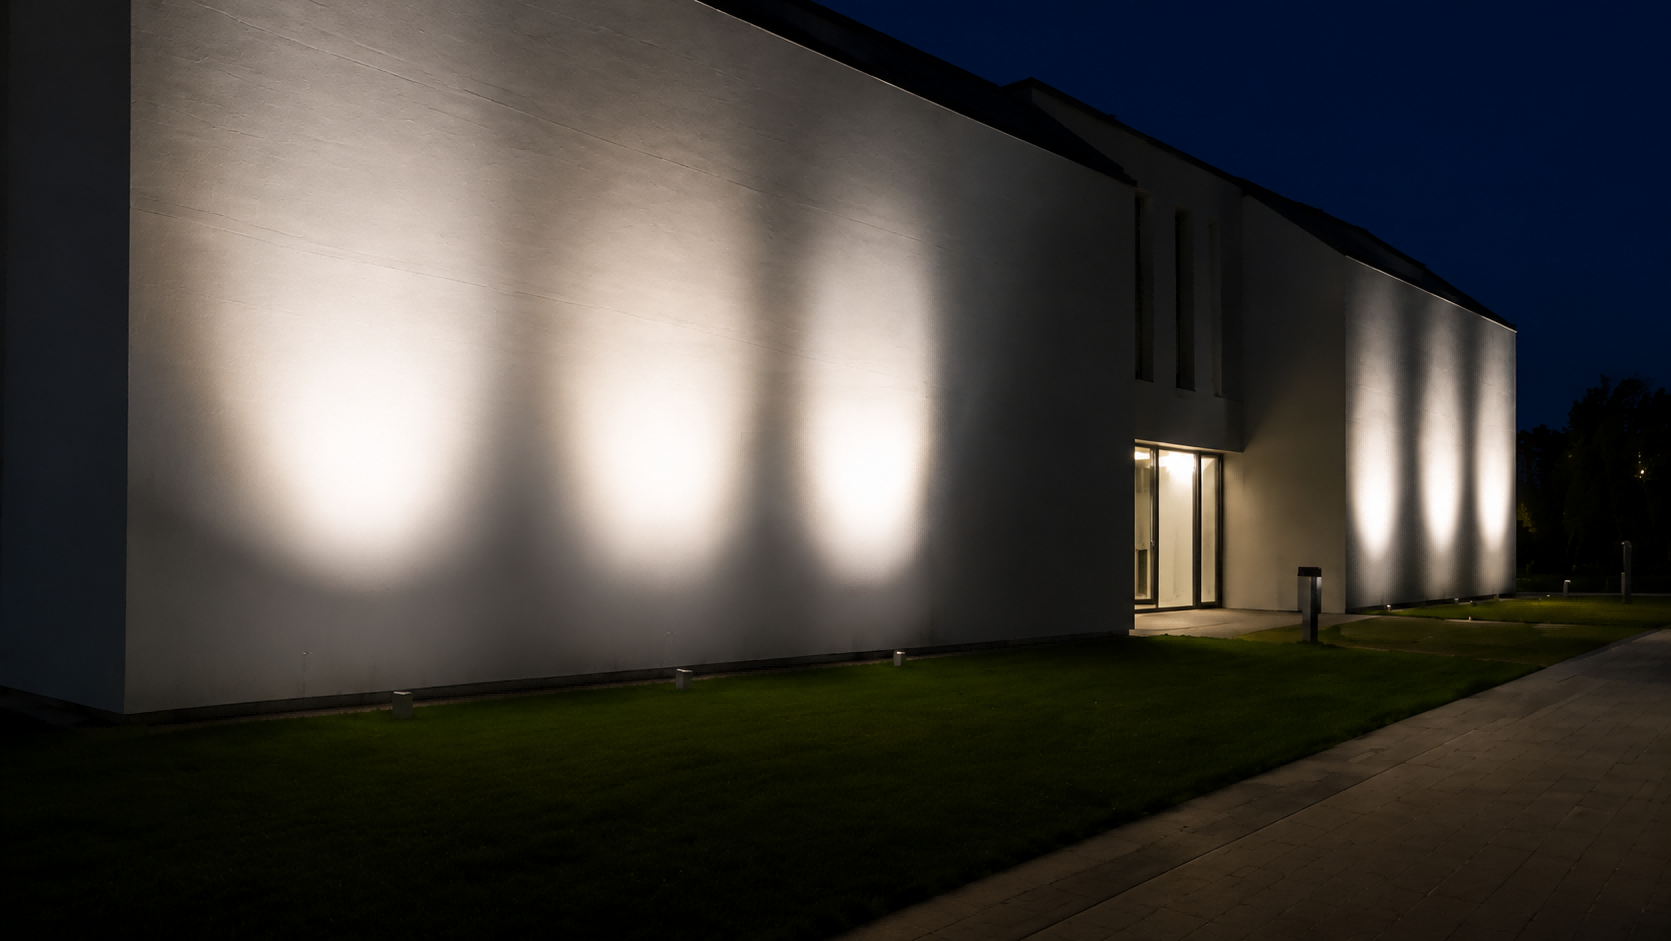
Take a wall washer. If you point a bare LED straight at a tall wall, the bottom will be way brighter than the top because it’s closer. A smart lens uses an asymmetric shape: it bends more light upward, compensating for the longer distance. The result? Uniform illumination from bottom to top. That’s not magic—it’s just a well-designed lens.
But here’s a mistake I see all the time: people think a “wide” lens is always soft and a “narrow” lens is always long. Not exactly. Beam angle matters, but so does the lens material and how clean the optics are. A cheap narrow lens might still have terrible stray light that kills your throw distance. Always ask for real photometric test reports, not just catalog numbers.
Controlling Beam Angles and Distribution
Beam angle is the most overused and misunderstood spec. Basically, it’s how wide the light spreads after leaving the fixture. Lenses control this by design, but real-world results vary a lot.
Narrow beams (≤15°) – Long throw, high intensity, small spot. Use for spires, bridge cables, distant signage. One warning: don’t put a narrow beam close to where people walk. It will burn their retinas.
Medium beams (20°–45°) – Balanced throw and coverage. This is your workhorse for facades, commercial walls, garden accents. It’s the least likely to go wrong if you’re unsure.
Wide beams (≥60°) – Soft, even, short throw. Great for lawns, plazas, flower beds. But watch out: many cheap “wide” lenses are just frosted plastic that kills efficiency. A good wide lens uses micro-optics to spread light evenly without losing too much output.
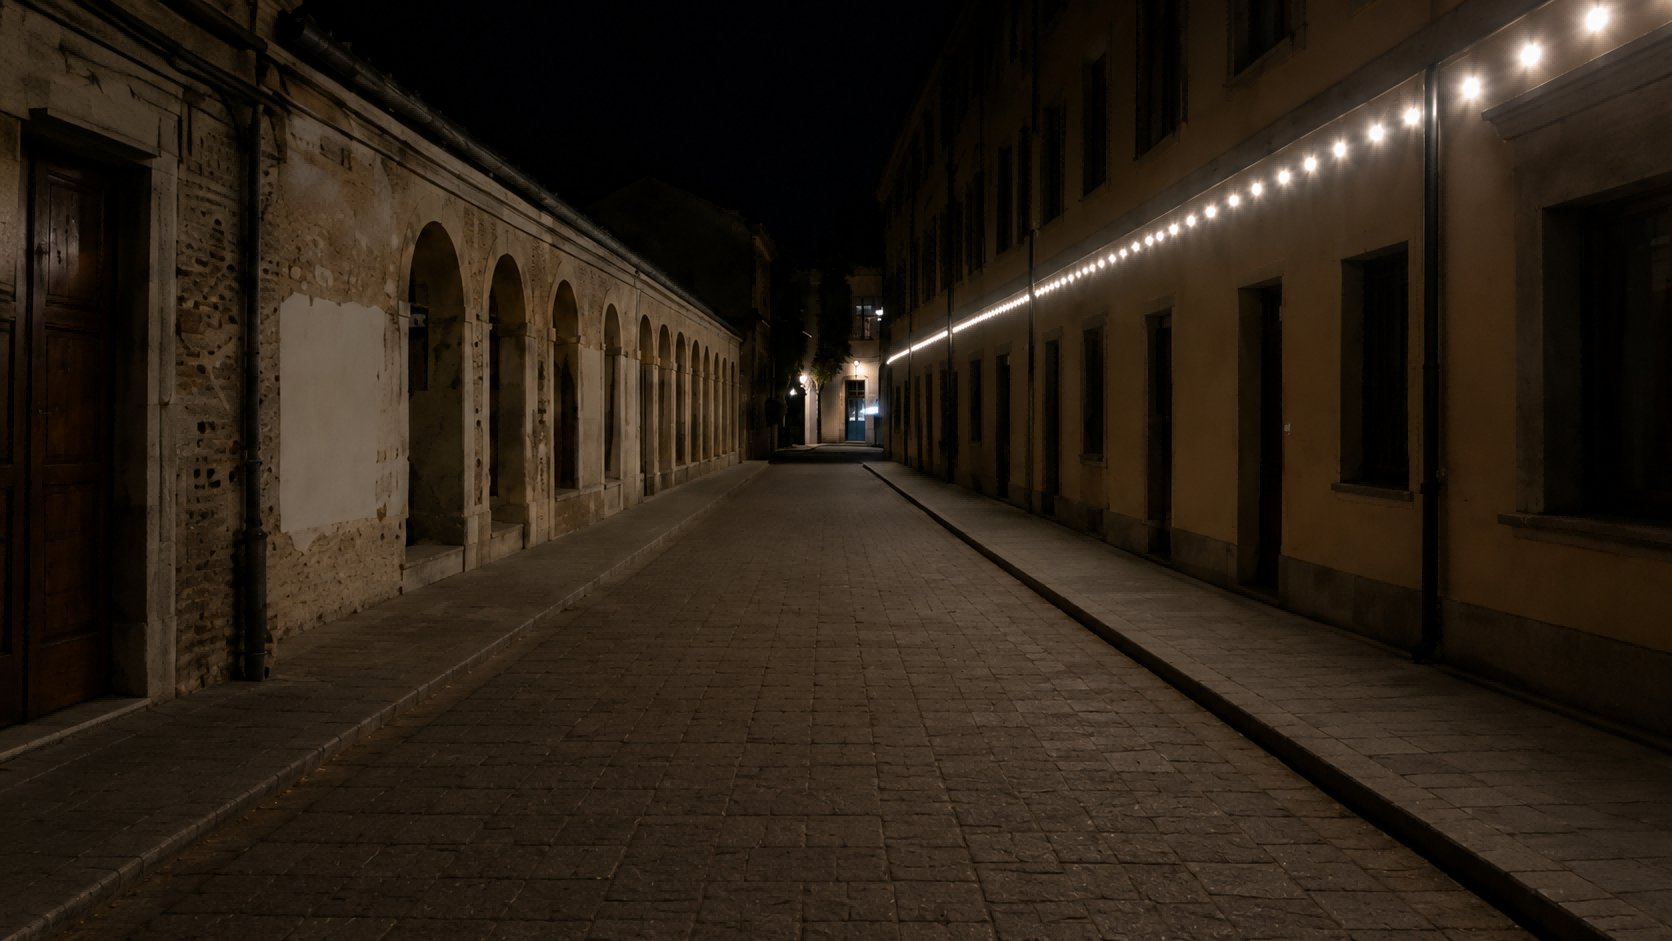
For linear fixtures, you need dual-axis control: narrow in the vertical direction (to get sharp cut lines) and blended along the length (to avoid seeing individual LED spots). I’ve seen too many “linear” lights that look like a string of cheap Christmas bulbs. That’s a bad lens design—or no lens at all.
Common Lens Types – What I Actually Use
I’m not going to list every lens ever made. Here’s what matters in real outdoor projects.
Convex lenses – Old school. They concentrate light and throw far. Thick, moderate efficiency. I use them only when I need a simple, cheap narrow beam and TIR is overkill. For bridges or tall building logos, they work okay. But they waste side light.
Diffuser lenses – They spread light and soften beams. Great for lawns and shrubs. The downside: they cut your throw distance significantly. I never use a diffuser alone if I need any real range. If you want soft but still decent output, get a lens with light diffusion micro-structures, not just a sandblasted surface.
Fresnel lenses – Adjustable beam, lightweight. Useful for large floodlights where you might need to change focus on site. The rings trap dust, so maintenance is a pain. I only recommend Fresnel if you actually need adjustable focus—like for events or temporary installations. For fixed outdoor projects, skip it.
TIR lenses (Total Internal Reflection) – This is the modern workhorse. High efficiency, versatile beam shaping, recycles side light that would otherwise be lost. Wall washers, linear lights, narrow floodlights—TIR does it all. The only downsides: higher mold cost, and installation has to be precise (a 0.5mm shift can ruin your beam pattern). But for serious outdoor projects, TIR is my default recommendation. Period.
So here’s my no-nonsense rule of thumb:
Long-distance projection → TIR (or convex+TIR if budget is tight), Asymmetric wall washing → TIR, no question, Wide, soft illumination → Diffuser with micro-optics, not cheap frosting, On-site adjustable focus → Fresnel, but be ready to clean dust, Don’t know what to pick? Start with a medium-angle TIR. It’s the least likely to fail.
Materials Matter – And Many People Get It Wrong
Lens material is where I see the most corner-cutting. Sure, a lens can look fine on paper, but after two summers in the sun, it’s yellow and cracked.
PMMA (acrylic) – High transmittance (~92%), good UV resistance if formulated right. It’s my go-to for most medium-power applications like wall washers and linear lights. But it’s not tough. Dropping a tool on it can crack it. And it can’t handle high heat—don’t put PMMA on a 10W LED with bad heatsinking.
PC (polycarbonate) – Tougher, impact-resistant, wide temperature range. This is what you want for bridges, high-power floodlights, anywhere there’s vibration or risk of hail. The trade-off: slightly lower transmittance (88–90%). And cheap PC without UV stabilizers will yellow in months. I only trust name-brand PC (SABIC LEXAN, Covestro Makrolon) with clear UV specs.
Glass – Premium, long-lasting, scratch-resistant, best clarity. But heavy, fragile, and expensive. I use glass only for extreme environments (marine, chemical plants) or when the client demands zero aging for 20+ years. For 95% of building facades, glass is overkill. A smarter combo: PMMA inner lens for precision optics, plus a flat glass outer cover for protection. That gives you the best of both worlds.
One more thing: anti-UV is not optional outdoors. If a supplier can’t show you UV test data (like ASTM G154), walk away. I’ve seen too many “outdoor” lenses turn yellow in 18 months.
Applications in Outdoor Projects – What Actually Works
I’ll keep this practical, not encyclopedic.
Facades – Wall washers need asymmetric TIR with batwing distribution. Linear lights need dual-axis control: narrow vertical, blended along length. Floodlights for accents? Medium beams (20–30°) generally work best. Don’t overcomplicate.
Bridges – Towers need narrow beams and vibration-resistant PC lenses. Cables? Elliptical or asymmetric optics to wrap light around without spill. Arches and railings often work well with medium-angle wall washers. And always over-spec the IP rating—bridge lights get wet.
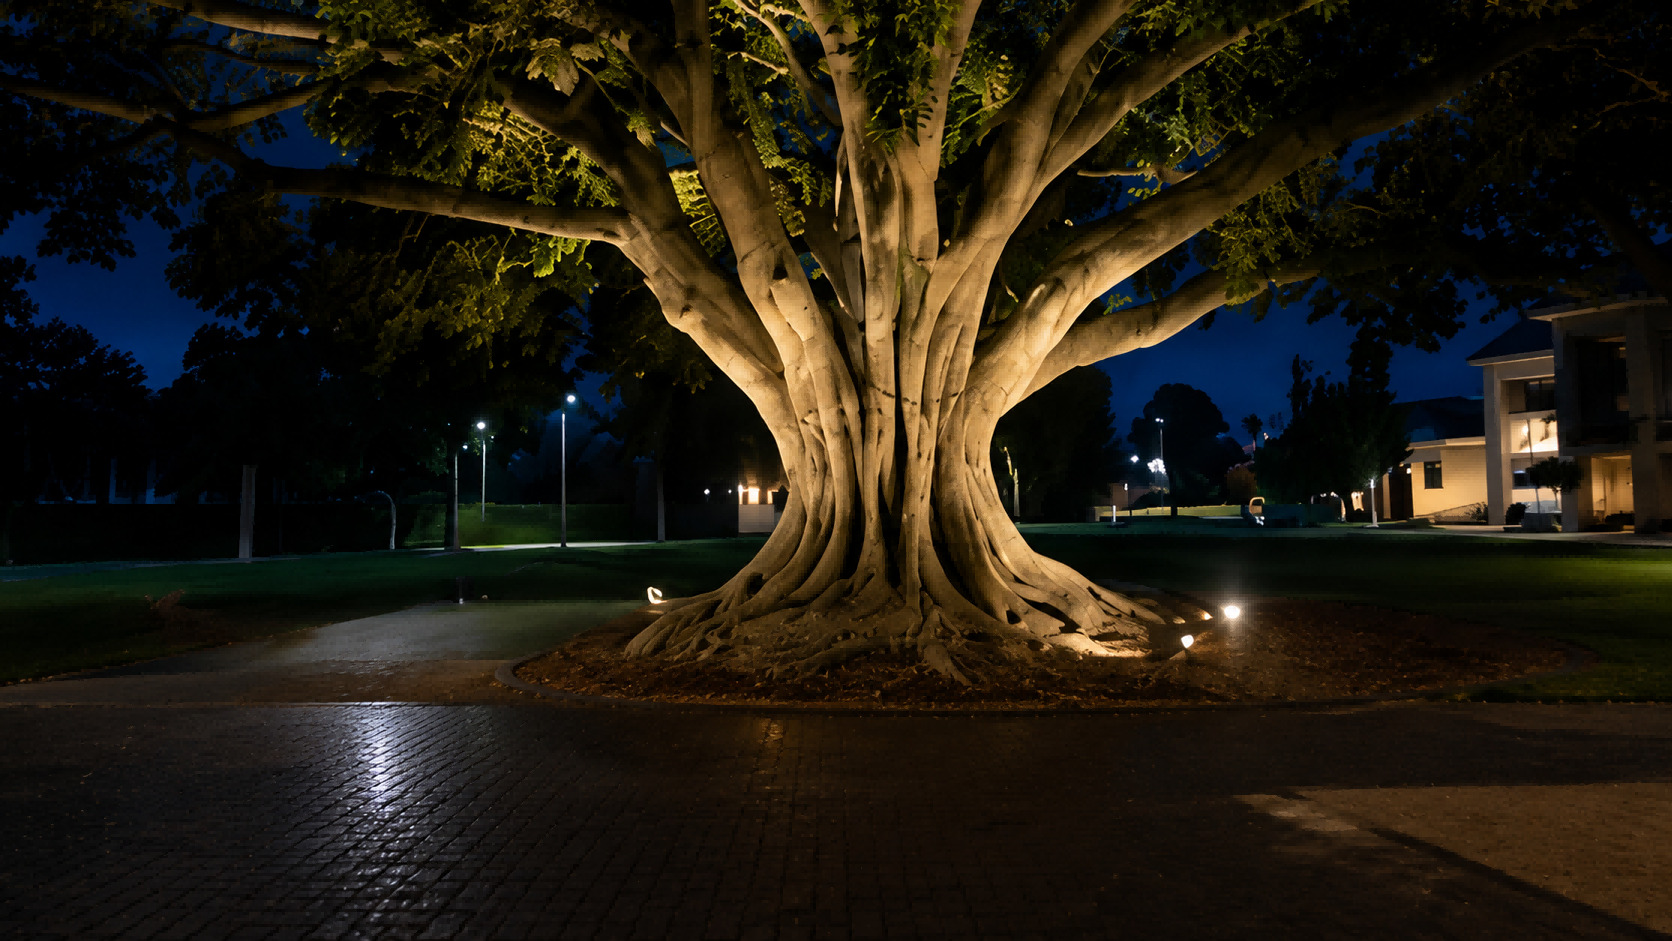
Landscapes – Trees: wide or elliptical lenses with smooth falloff. Shrubs: frosted or honeycomb lenses for soft, non-glaring light. Paths and steps: asymmetric or gridded diffusion for glare control. And please, for the love of good design, don’t use narrow beam uplights under every tree unless you want a horror movie effect.
Commercial outdoor spaces – Streets, parking lots, terraces: medium-to-wide lenses, but with sharp cutoff to avoid light trespass. High-end hotel entrances? Narrow floodlights plus deep-baffle linear lenses for drama. And always check glare angles for drivers and pedestrians.
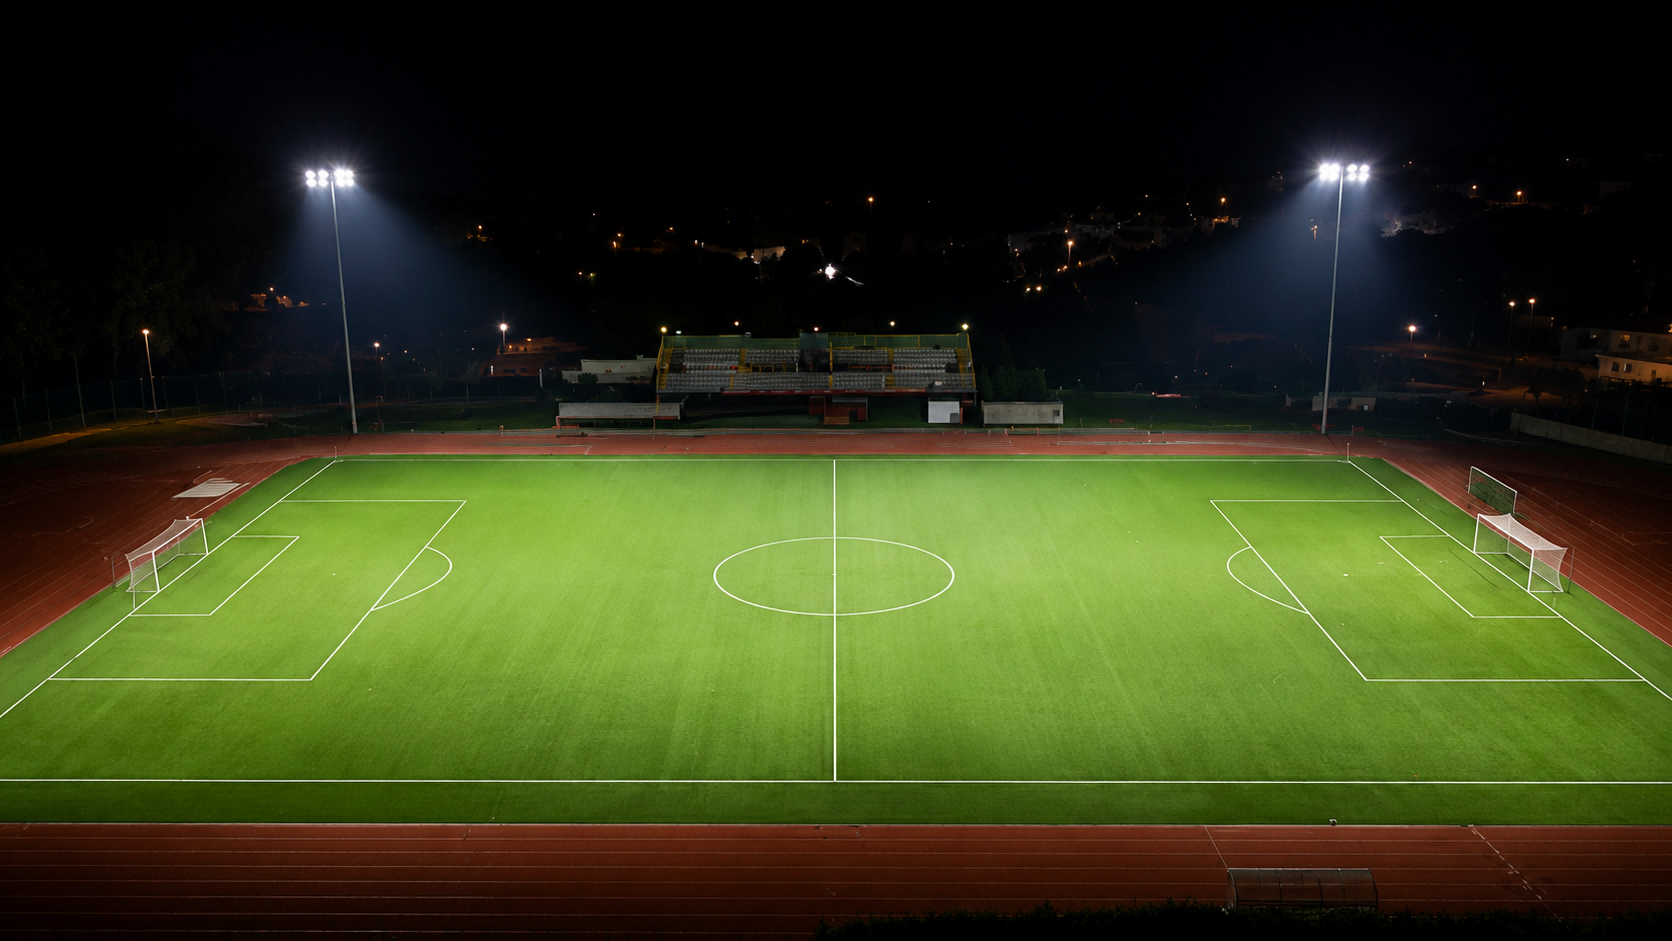
Sports venues – Main field: narrow-to-medium asymmetric or rectangular beams to cover the shape efficiently. Spectator stands: medium-wide for uniform fill, minimal glare. Emergency lighting: narrow/medium to maintain basic coverage with fewer fixtures. One tip: always test a mockup row before ordering hundreds. Beam angles look different at 40m height.
Choosing the Right Lens – A Short Checklist
I hate long theoretical lists. Here’s what I actually ask when choosing a lens:
Beam angle – Match to distance and area. If you guess, guess medium. You can always add more fixtures.
Installation distance – Don’t trust catalog numbers. Test if possible. Distance changes everything.
Lighting effect – Do you want uniform wash, sharp accent, soft ambient? Don’t mix unless you have to.
Outdoor durability – UV? Temperature range? Impact risk? Cheap materials fail fast.
Maintenance – Can you clean the lens easily? Can you replace it without trashing the fixture? Modular lens design saves headaches later.
And here’s my strongest opinion: never buy lenses without seeing a photometric report. I don’t care how cheap they are. A bad lens will waste more money in rework than you save upfront.
Brand Introduction Paragraph
At LNJAMI, we have spent years refining optical lens solutions for outdoor lighting projects that demand both precision and reliability. From asymmetric wall washer optics to narrow-beam TIR lenses and wide-angle diffusion designs, our lenses are developed to deliver cleaner cut-offs, smoother beam distribution, and more consistent lighting results in real project conditions. Whether the application is a facade, bridge, landscape, commercial entrance, or sports venue, our goal is the same: to help lighting fixtures perform exactly the way designers intended, with less glare, better uniformity, and longer-lasting optical stability.
Conclusion
Lenses are small, but they’re the difference between a lighting project that looks professional and one that looks like a mistake. They shape the light, control reach, spread, uniformity, comfort, and glare. Across facades, bridges, landscapes, commercial areas, and sports venues, the right lens gives you efficiency, precision, and visual impact.
Here’s what I want you to remember: a good lens transforms light from a blunt instrument into a tool for storytelling and design. In modern outdoor lighting, understanding lenses isn’t optional—it’s essential. And once you stop treating lenses as a commodity and start treating them as a strategic choice, your projects will look better, last longer, and cost less to maintain.
Now go test some lenses on a wall. You’ll see what I mean.
FAQs
Q1: What is the difference between a TIR lens and a standard convex lens?
A TIR (Total Internal Reflection) lens captures and redirects almost all the light from the LED, including the side‑emitting light that a convex lens wastes. This makes TIR lenses much more efficient (typically 85–95% vs 60–75% for convex) and allows precise beam shaping—asymmetric, elliptical, or batwing patterns. Convex lenses are simpler and cheaper, but they leak side light and offer less control. For serious outdoor projects (wall washers, linear lights, floodlights), TIR is the modern standard.
Q2: Can I use a standard acrylic lens for outdoor lighting without UV stabilization?
No. Non‑UV‑stabilized acrylic will turn yellow, become hazy, and crack within 12–24 months of direct sunlight. This reduces light output, shifts color temperature, and looks unprofessional. Always ask for UV‑stabilized acrylic with test data (e.g., ASTM G154). If a supplier can’t provide UV proof, choose polycarbonate or glass instead.
Q3: How do I avoid the “Christmas light” effect on long linear fixtures?
That effect happens when individual LED light spots remain visible instead of blending into a continuous line. The fix is a lens with dual‑axis control: narrow beam in the vertical direction (to keep light on the wall) and wide diffusion along the length to blend the LEDs. Look for frosted TIR lenses or micro‑optic diffuser plates. Cheap linear lights often skip this and look terrible. Always test a 1‑meter sample on your intended surface before ordering hundreds.
Q4: How can I verify a lens supplier’s quality without expensive test equipment?
Three simple checks: First, ask for a photometric test report (IES or LDT file) for the fixture with that lens. Second, request a UV test report (ASTM G154 or equivalent) to confirm material stability. Third, order a small sample (2–3 lenses) and mount them on a test board. Compare beam pattern, color uniformity, and glare against a known good reference. A reputable supplier will provide all of these. If they hesitate, walk away.
Q5: What does “batwing distribution” mean and why is it important for wall washing?
Batwing distribution describes a lens that sends most light to the sides (at wider angles) rather than straight down. When a wall washer is mounted close to a facade, the bottom of the wall is much closer than the top. A batwing lens pushes light upward and outward, balancing the illumination so the wall looks evenly lit from bottom to top. Without it, you get a bright hotspot near the fixture and a dark upper wall. Almost all professional wall washers use asymmetric TIR lenses with batwing patterns.